Showing posts with label messy. Show all posts
Showing posts with label messy. Show all posts
Tuesday, December 18, 2012
Getting Ready for Gruit!
I'm sipping Mama's Witbier, and I'm down to just a couple bottles. Thank goodness I've got that Molasses (Wh)E(at)SB in the bottles getting carbed up!
Between the last post and now I spent a lot of time researching different healing herbs that are also often paired with tea or traditional brewing of healing beers.
I put together a recipe for a pretty basic, Munich-y Irish Red Ale with grains I have hanging out in my brew closet. I'm going to use it as a base for a gruit in the morning. Once I get done with this post, I'm going to measure all the pieces out to get it ready for the morning.
I've got Nottingham sitting in the fridge, ready to eat some wort and make beer, and I know my yeasty-beasties can't wait to start chewing up some sugar. If only I had a wort for them!
First, the grains for 3 gallons of a healing gruit:
3 pounds of Rahr 2-Row
2 pounds of Munich Malt
5 ounces of piloncillo
5 ounces of flaked barley
4 ounces of Rahr Red Wheat
2 ounces of Debittered Carafa I
I will use hops. My gruit research indicates that hops are still a must, because they keep beer from spoiling. I don't want a sour gruit! I'm going to use just enough hops to get the IBU up to a legal Irish Red Ale. That's 0.3 ounces of Cluster @60 for bittering, and 0.15 Styrian Celeja @30, and 0.15 Styrian Celeja @10. Styrian Celeja is a hop without too much distinctive flavor. It is a pleasant flavor, but it isn't a citrus and spice bomb like Cluster, and Celeja seems to be noteworthy for adding a sense of hoppiness and little else. It's good for malt-forward beers, I've noticed. In this case, it will be used for herb-forward beer.
I spent a few hours researching different good herbs for male health - particularly cardio-vascular health as it's an area I feel like I could always improve in the winter.
Are you ready for this? I'm about to destroy this beer, to your eyes, with an insane drink-able experiment that has quite a lot going on.
Chamomile, Rosemary, Sage, Cinnamon, Ginger, Cardamom, Black Pepper, Turmeric, Coriander, Crushed Red Pepper, and Orange Peel.
The other thing I was doing this evening, while researching herbs, was making tiny tea blends to figure out what will not be nasty to drink. The thing that was so surprising is how drinkable sage, chamomile, rosemary, cinnamon, ginger, coriander, and black pepper are, together. One could legitimately make a tea out of this combination of things. The turmeric is dangerous, and must be kept in a very minimal amount. The hot pepper is dangerous and must be kept, again, minimal.
Still, for the goal of a healing brew, both turmeric and hot pepper are excellent for cardio-vascular health. Even a little bit - and it will be just a teensy, tinsy little bit of each - should make a subtle difference in the health of vital organs. The only herbs that do not aid the heart and veins are cardamom and coriander, and these are mostly digestive aids, to help all this stuff go down with a good flavor!
With all of these herbs and spices, a little bit goes a long way in both flavor and health impact. The hope is that this will be a drinkable, enjoyable brew that gets the elegant complexity of flavors from healing herbs, not hops or yeasts.
It will be an adventure of complex flavors and aromas. I'm going to go measure it all out.
This will be madness of the maddest sort.

Sunday, December 2, 2012
BREWDAY: Molasses (Wh)E(at)SB
Prononuced: "mole-ASS-ee WEET-sbee" It is, as can be deduced, a London ESB style with the twist of copious wheat malt, and a healthy dose of Blackstrap Molasses. (Also, some flaked oats. Flaked oats are great. So it'll be a little cloudy, so what? It's already a wheat beer!)
I just put this one in the primary yesterday. I'm getting the process down, and things are starting to get a lot better. This time, I was outside, again, grinding the grains, and I attempted to grind directly into the brew-kettle, with the bag already in place for the Brew-In-A-Bag brewday. I don't think I'll do this again, because as I was doing it I was concerned about the wear and tear on the brew bag. The whole point of this, to me, is to not be buying replacement equipment every ten minutes.
This was also an experiment in saved yeast from my Cluster Bomb. I am currently waiting to see if it takes off. I have some spare yeast, just in case of a failure to launch.
Another experiment: Reading on-line about other folks' recommendations with BIAB, I *dramatically* increased my efficiency by dunking the bag in the water a bit, then squeezing the bag, then placing the bag in a separate (dry, unheated) pot to let even more grain juice schlurp out of the bag.
I was looking at a brix of just over 10 before I did this, and ended up with a brix just above 16! I added some clean, filtered water just to get the brix down closer to the desired strength just before boiling!
Regardless, I have high hopes that this brew will come out good, even if it isn't on spec.
I made the crystal malt and the brown malt at home, using the instructions of John Palmer from "How to Brew" and it came out smelling wonderful, and providing a rich color to the brew. I made it with Rahr 2-Row.
Molasses (Wh)E(at)SB
3.75 gallon boil
batch size 3 gallons
boil time 60 minutes at 76% efficiency for figuring, but as I mentioned I had ridiculous efficiency such that I had to water it down just to keep from making an alcohol missile of a brew.
3 pounds of Rahr 2-row (40%)
3 pounds of Rahr Red Wheat (40%)
6 ounces homemade Brown Malt (5%)
6 ounces homemade Crystal 60l (5%)
6 ounces Quaker Quick Oats (5%)
6 ounces Blackstrap Molasses (5%)
0.6 ounces of Styrian Celeja @60 for 14.83 IBU
0.6 ounces of Styrian Celeja @30 for 11.4 IBU
0.6 ounces of Styrian Celeja @10 for 5.38 IBU
I used Danstar Nottingham that I harvested from a Cluster Bomb, and I'm hoping with fingers crossed that it will take. If it doesn't, I've got some spare dry Belgian yeast in the fridge, just in case, but I expect Nottingham to taste better in a Molassy London ESB-style of beer. Fingers crossed!
Pictures forthcoming... Later.
I just put this one in the primary yesterday. I'm getting the process down, and things are starting to get a lot better. This time, I was outside, again, grinding the grains, and I attempted to grind directly into the brew-kettle, with the bag already in place for the Brew-In-A-Bag brewday. I don't think I'll do this again, because as I was doing it I was concerned about the wear and tear on the brew bag. The whole point of this, to me, is to not be buying replacement equipment every ten minutes.
This was also an experiment in saved yeast from my Cluster Bomb. I am currently waiting to see if it takes off. I have some spare yeast, just in case of a failure to launch.
Another experiment: Reading on-line about other folks' recommendations with BIAB, I *dramatically* increased my efficiency by dunking the bag in the water a bit, then squeezing the bag, then placing the bag in a separate (dry, unheated) pot to let even more grain juice schlurp out of the bag.
I was looking at a brix of just over 10 before I did this, and ended up with a brix just above 16! I added some clean, filtered water just to get the brix down closer to the desired strength just before boiling!
Regardless, I have high hopes that this brew will come out good, even if it isn't on spec.
I made the crystal malt and the brown malt at home, using the instructions of John Palmer from "How to Brew" and it came out smelling wonderful, and providing a rich color to the brew. I made it with Rahr 2-Row.
Molasses (Wh)E(at)SB
3.75 gallon boil
batch size 3 gallons
boil time 60 minutes at 76% efficiency for figuring, but as I mentioned I had ridiculous efficiency such that I had to water it down just to keep from making an alcohol missile of a brew.
3 pounds of Rahr 2-row (40%)
3 pounds of Rahr Red Wheat (40%)
6 ounces homemade Brown Malt (5%)
6 ounces homemade Crystal 60l (5%)
6 ounces Quaker Quick Oats (5%)
6 ounces Blackstrap Molasses (5%)
0.6 ounces of Styrian Celeja @60 for 14.83 IBU
0.6 ounces of Styrian Celeja @30 for 11.4 IBU
0.6 ounces of Styrian Celeja @10 for 5.38 IBU
I used Danstar Nottingham that I harvested from a Cluster Bomb, and I'm hoping with fingers crossed that it will take. If it doesn't, I've got some spare dry Belgian yeast in the fridge, just in case, but I expect Nottingham to taste better in a Molassy London ESB-style of beer. Fingers crossed!
Pictures forthcoming... Later.
Wednesday, October 31, 2012
BREWDAY: Wise Pumpkin Says Dunkel for Halloween
The seasonal brews are one of my favorite things to do. Most brewers don't like pumpkin beer. It is a plebian affair, after all, and you have to like what pumpkin tastes like to like it in a brew. Pumpkin has a flavor. It is not necessarily a pie flavor. In fact, most pumpkin pies are made with butternut squash. Still, for those of us who do enjoy pumpkin, a seasonal brew with the fruits of the autumn harvest is the perfect time to celebrate that pumpkin love.
Ah, pumpkin. Ah, Halloween. Halloween pumpkin. Ah. Yes.


Here's what I came up with from my handy brew closet supply:
3 gallon batch
1 whole roasted pumpkin pie pumpkin (about 2 1/3 pounds, cleaned, in this case)
2 pounds of red wheat malt
8 ounces of 2-row
8 ounces of caramunich
8 ounces of piloncillo sugar
2 ounces of carafa i
2 ounces of quaker quick oats
.8 ounces of Styrian Celeja hops @60
.2 ounces of Styrian Celeja hops @30
1 teaspoon of pumpkin pie spice blend (in this case, McCormick's brand. I did a good strong amount because the container is years old. Were this a fresh batch of homemade stuff, I'd use 1/3 of a teaspoon!)
1/2 teaspoon of Chinese Five Spice (in this case, a homemade blend, about a year old, containing fennel, star anise, clove, szechuan peppercorn, and cinnamon)
Things I did differently this time:
I used 3.75 gallons of storebought spring water to fill my kettle, this time. I want to see if I can isolate either the water or the sanitation process. I kept my sanitation the same, with the bleach and the rinsing of bleach. Let's see if it is (as I suspect) likely coming from the hard, chlorinated San Antonio tap water.
I've had good results with overnight mashing, and I'm going to keep doing it, for now, until I can get a refractometer. I've ordered one, but it is not here, yet.
So, I got my strike water up to 175 degrees, doughed in with my fresh crushed grain and pumpkin, and got the temperature up to about 155. Then, I placed my kettle in a pre-heated oven at 170 degrees. I flipped the oven off, went to bed, and did the rest of the boil in the morning. Simple.
Pumpkin. I love pumpkin. I could take a cured cinderella pumpkin, slice it up like fine cheese and eat it raw. I could make pumpkin bread, and pumpkin alcohol, and pumpkin cinnamon rolls... I love pumpkin!
How do you process a pumpkin for homebrew if you don't have a food processor? Ours was dirty, and I was too lazy to clean it, so I had to find a different way. I put the roasted pumpkin in a plastic bag, and smashed it up with my hands, crushing it inside of the plastic bag into a gooey paste. It was clean and easy to work with, and seemed to lead to good conversion in the kettle. Time will tell. Time will tell. Refractometer en route.
Anyway, the wise pumpkin says dunkel, because yeast should have a flavor, and the spicy, fruity German yeast will complement the spicy, fruity pumpkin brew. It will not be another commercial amber pumpkin ale. (I could buy that in the store, if I wanted it!) It will be something I haven't seen out and about. And, my hope is that the piloncillo and caramunich will impart a rich caramel flavor to go with the pumpkin and the spice. Caramel pumpkin is a wise combination, no?
Pictures:


Wednesday, October 24, 2012
BREWDAY: When life drops your butternut, make BUTTERNUT ALE!
Upon the kitchen table that is a family heirloom from when my parents were first married, I had placed two pie pumpkins, and a butternut squash.
I had every intention of making a pumpkin beer in a couple weeks, after pipelining some simple, small SMaSH Pale Ales to feature Cluster and Styrian Celeja hops in two otherwise identical brews. I had even toasted up 8 ounces of malt to a nice, nutty, medium toast, to be divided up between the two pale ales. I had even made up 8 ounces of a home-roasted caramel malt, made from soaking grain and caramelizing it in the oven and then roasting it to dry it out. I had done these things for Pale Ales.
The gods of homebrew hurled my butternut squash upon the ground. It cracked at the top, splitting evenly down the center, and halfway down the fruit.
Immediately, I roasted the squash to make some use out of it. If I had left it alone, it would have just rotted like that.
So... That was not part of our dinner plans, just yet.
Beer gods demanded Butternut Squash Beer.
Interesting fact: Most homebrewers who make pumpkin beer are probably already making butternut squash beer, because most commercial cans of pumpkin puree are actually a type of butternut squash, or a hybrid variety of squash/pumpkin called Dickenson Field Squash. Actual pumpkin, if you made it into a pie, would be a golden yellow color, not the orange we know and assume means pumpkin. Butternut Squash is what people are really thinking about, when they're imagining the flavor of pumpkin in their mind. It's richer, deeper, with a bright orange color, and it's a perfect thing to make beer with on an early autumn day!
I cobbled together a recipe with what I had lying around. Fortunately, I did have some more interesting malts in the brewcloset. (Plus some fresh spices straight from Grenada courtesy of my wife, whose family harvest cocoa, cinnamon, and amazing nutmeg and send it to us from their farm. Nutmeg and cinnamon were both from Grenada!)
This batch turned into a 3 gallon brew when I lost track of how much water I was pouring into the darn brew kettle... The end result was around 3 gallons, right?
I pulled up my edition of iBrewmaster...
BUTTERNUT STOUT!
3 gallons, thereabouts
OG: 1.062
FG: 1.017
30 SRM
(estimated mash efficiency of 86%)
3 pounds of Rahr 2-Row Pale
1 pound of Munich Malt
8 ounces of home-toasted malt
8 ounces of home-made caramel malt, est. at 100L-140L
6 ounces of Caraffa I
6 ounces of Dark Brown Sugar, added to the boil
half of a roasted butternut Squash for about 1.5 pounds, pureed
@60 minutes use 1 ounce of Cluster hops for about 40 IBU
@15 minutes, add one small cinnamon stick, 1/2 tsp of fresh-ground Nutmeg, .25 ounces of grated, fresh Ginger
Include in the full Primary (or secondary instead, if you plan to use one) with 1/4 of the cooked, pureed butternut squash
Pitch 1 full packet of Safale S-04
With Brew-in-a-bag, and a very fine grind, I'm expecting a super efficiency. I also did another overnight mash. In fact, my overnight mash went long because I got pulled away for some stuff for work in the morning, and could not get to the wort after eight hours. It was a thirteen-hour mash, then. I set the oven to 180 degrees when my wort, on the stovetop, was protein resting at 122 degrees for twenty minutes. By the time I got the wort to 154 degrees, the oven had reached 180 degrees. I put my kettle inside to mash overnight, and flipped the oven off. When I woke up, before I got an e-mail from work, I had flipped the oven back on to buy someself some more time, to 200 degrees. I had started the mash at ten o'clock, and didn't mash-out until almost eleven-fifteen.
And, my grind was very small, too. I was really aiming to pulverize this stuff, because I wanted to give BIAB a real go of it with a finer grind.
Anyway, woot for butternut squash! There's still a quarter of the squash sitting in the fridge for my wife.
Of note:
The squash that I put into the primary fermenter was microwaved just before putting it into the primary good and long, to make sure it was completely cooked and to make sure it was completely sanitary. It seemed like the easiest way to sanitize something that likes being cooked in a microwave, right?
Of note: Pictures of a brewday that was messy and spontaneous and fun.
The smell in the primary, just before pitching, was stunning. A milder dark roast, with Caraffa I instead of chocolate and medium-toasted malts instead of dark roasted malts, may not be the "perfect to style" stout, but it does ease into the stout flavors, allowing the butternut pie flavor with the sweetness of the caramel malts, to shine over the top of the dark, thick brew!
It's the sort of thing that makes me want to use exclamation points. Because the squash fell! I can make it into beer! The beer smells really good! Everything is working!
BUTTERNUT STOUT!
Pictures:


I had every intention of making a pumpkin beer in a couple weeks, after pipelining some simple, small SMaSH Pale Ales to feature Cluster and Styrian Celeja hops in two otherwise identical brews. I had even toasted up 8 ounces of malt to a nice, nutty, medium toast, to be divided up between the two pale ales. I had even made up 8 ounces of a home-roasted caramel malt, made from soaking grain and caramelizing it in the oven and then roasting it to dry it out. I had done these things for Pale Ales.
The gods of homebrew hurled my butternut squash upon the ground. It cracked at the top, splitting evenly down the center, and halfway down the fruit.
Immediately, I roasted the squash to make some use out of it. If I had left it alone, it would have just rotted like that.
So... That was not part of our dinner plans, just yet.
Beer gods demanded Butternut Squash Beer.
Interesting fact: Most homebrewers who make pumpkin beer are probably already making butternut squash beer, because most commercial cans of pumpkin puree are actually a type of butternut squash, or a hybrid variety of squash/pumpkin called Dickenson Field Squash. Actual pumpkin, if you made it into a pie, would be a golden yellow color, not the orange we know and assume means pumpkin. Butternut Squash is what people are really thinking about, when they're imagining the flavor of pumpkin in their mind. It's richer, deeper, with a bright orange color, and it's a perfect thing to make beer with on an early autumn day!
I cobbled together a recipe with what I had lying around. Fortunately, I did have some more interesting malts in the brewcloset. (Plus some fresh spices straight from Grenada courtesy of my wife, whose family harvest cocoa, cinnamon, and amazing nutmeg and send it to us from their farm. Nutmeg and cinnamon were both from Grenada!)
This batch turned into a 3 gallon brew when I lost track of how much water I was pouring into the darn brew kettle... The end result was around 3 gallons, right?
I pulled up my edition of iBrewmaster...
BUTTERNUT STOUT!
3 gallons, thereabouts
OG: 1.062
FG: 1.017
30 SRM
(estimated mash efficiency of 86%)
3 pounds of Rahr 2-Row Pale
1 pound of Munich Malt
8 ounces of home-toasted malt
8 ounces of home-made caramel malt, est. at 100L-140L
6 ounces of Caraffa I
6 ounces of Dark Brown Sugar, added to the boil
half of a roasted butternut Squash for about 1.5 pounds, pureed
@60 minutes use 1 ounce of Cluster hops for about 40 IBU
@15 minutes, add one small cinnamon stick, 1/2 tsp of fresh-ground Nutmeg, .25 ounces of grated, fresh Ginger
Include in the full Primary (or secondary instead, if you plan to use one) with 1/4 of the cooked, pureed butternut squash
Pitch 1 full packet of Safale S-04
With Brew-in-a-bag, and a very fine grind, I'm expecting a super efficiency. I also did another overnight mash. In fact, my overnight mash went long because I got pulled away for some stuff for work in the morning, and could not get to the wort after eight hours. It was a thirteen-hour mash, then. I set the oven to 180 degrees when my wort, on the stovetop, was protein resting at 122 degrees for twenty minutes. By the time I got the wort to 154 degrees, the oven had reached 180 degrees. I put my kettle inside to mash overnight, and flipped the oven off. When I woke up, before I got an e-mail from work, I had flipped the oven back on to buy someself some more time, to 200 degrees. I had started the mash at ten o'clock, and didn't mash-out until almost eleven-fifteen.
And, my grind was very small, too. I was really aiming to pulverize this stuff, because I wanted to give BIAB a real go of it with a finer grind.
Anyway, woot for butternut squash! There's still a quarter of the squash sitting in the fridge for my wife.
Of note:
The squash that I put into the primary fermenter was microwaved just before putting it into the primary good and long, to make sure it was completely cooked and to make sure it was completely sanitary. It seemed like the easiest way to sanitize something that likes being cooked in a microwave, right?
Of note: Pictures of a brewday that was messy and spontaneous and fun.
The smell in the primary, just before pitching, was stunning. A milder dark roast, with Caraffa I instead of chocolate and medium-toasted malts instead of dark roasted malts, may not be the "perfect to style" stout, but it does ease into the stout flavors, allowing the butternut pie flavor with the sweetness of the caramel malts, to shine over the top of the dark, thick brew!
It's the sort of thing that makes me want to use exclamation points. Because the squash fell! I can make it into beer! The beer smells really good! Everything is working!
BUTTERNUT STOUT!
Pictures:


Wednesday, October 17, 2012
BOTTLING DAY: Golden Cloud Ale
Today was the day. The beer had stopped fermenting, and it was time to put it in a bottle.
I've used Danstar Munich before and gotten good results, but I have to wonder if the difference between extract brewing (and water PH?) had any effect on this batch. It was a mess. The beer was not clear. It was not clearing. It was just sort of stuck exactly where it was supposed to be, at my target gravity (1.014). It wasn't cleaning itself up, and I needed the bucket and the yeast cake. So, I made a judgment call. Bottle this gloopy mess. Hefeweizens are supposed to have some yeast, right?
Right?
If I had known how much yeast was still hovering in the wort, I'd have tried again.


 I got 15 bottles before it was too sludgy to move.
It tastes all right. The yeast is definitely a part of the beer, and gives it a creamy texture enhanced by the use of oats in the mash. The head is thick and foamy and rich.
Coming in warm, I'm tasting a lot of clove in the beer. I wanted to see what that meant, when people talk about the clove and the banana, and try a couple beers to find that range. Well, I found the clove range, for sure. It's not unpleasant when cold, but it's definitely something i'd like better if there was blood oranges in the batch. The next batch (currently bubbling away) will be kept much cooler to aim for the banana esters.
The toasted malts have definitely improved the recipe, as well. There's an indescribable something in the malts, sweeter and nuttier than expected. There's something there, and it's wonderful, and it's hard to place on the palate. The color is beautiful. The beer is refreshing and spicy and there's just that nice hint of sweet toastiness somewhere, riding over the clove esters. It's not a caramel malt sweetness, and not a roasted barley toastiness, but it's there, just on the palate and gone.
Give it time. Maybe the beer'll get better.
Takeaways:
1) Research how Danstar Munich reacts to different kinds of water, because maybe that's why it would not drop clear out of the wort.
2) Research my own water, here in San Antonio, and see if I can't find a way to do it better with either water treatments or Reverse-Osmosis water, or even just the spring water I used to use in Decatur, GA, because the tap water was no good. Did the hard water I used impact the flavor?
3) Be more disciplined with temperature control. I wanted to let it run hot to see what it tasted like that way, and now I know. It isn't bad. In fact, in a blood orange hefeweizen, I'd say it would be ideal for me to have more clove, but in this toasted malt hefe, it isn't the right balance. Cool it off, and aim banana with toasted malts.
Aim banana. Lesson learned.
Hey, want to find out about the Blood Orange Hefeweizen that's so popular on-line? Sure ya do:
Right! A great time was had by all, and some beer is in front of me that needs drinking. Next time, BREWDAY: Red River Ale!
I got 15 bottles before it was too sludgy to move.
It tastes all right. The yeast is definitely a part of the beer, and gives it a creamy texture enhanced by the use of oats in the mash. The head is thick and foamy and rich.
Coming in warm, I'm tasting a lot of clove in the beer. I wanted to see what that meant, when people talk about the clove and the banana, and try a couple beers to find that range. Well, I found the clove range, for sure. It's not unpleasant when cold, but it's definitely something i'd like better if there was blood oranges in the batch. The next batch (currently bubbling away) will be kept much cooler to aim for the banana esters.
The toasted malts have definitely improved the recipe, as well. There's an indescribable something in the malts, sweeter and nuttier than expected. There's something there, and it's wonderful, and it's hard to place on the palate. The color is beautiful. The beer is refreshing and spicy and there's just that nice hint of sweet toastiness somewhere, riding over the clove esters. It's not a caramel malt sweetness, and not a roasted barley toastiness, but it's there, just on the palate and gone.
Give it time. Maybe the beer'll get better.
Takeaways:
1) Research how Danstar Munich reacts to different kinds of water, because maybe that's why it would not drop clear out of the wort.
2) Research my own water, here in San Antonio, and see if I can't find a way to do it better with either water treatments or Reverse-Osmosis water, or even just the spring water I used to use in Decatur, GA, because the tap water was no good. Did the hard water I used impact the flavor?
3) Be more disciplined with temperature control. I wanted to let it run hot to see what it tasted like that way, and now I know. It isn't bad. In fact, in a blood orange hefeweizen, I'd say it would be ideal for me to have more clove, but in this toasted malt hefe, it isn't the right balance. Cool it off, and aim banana with toasted malts.
Aim banana. Lesson learned.
Hey, want to find out about the Blood Orange Hefeweizen that's so popular on-line? Sure ya do:
Right! A great time was had by all, and some beer is in front of me that needs drinking. Next time, BREWDAY: Red River Ale!


Monday, October 15, 2012
Roasted Chocolate Wheat Experiment #1
This process looked like it was going to be the easiest one, yet.
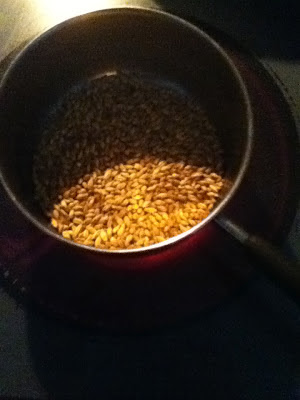
Stovetop roasting of Rahr Red Wheat, half an hour at a medium/low heat, with constant stirring, followed by degassing in a paper bag for a week.
Simple right? For this recipe, I wanted 2 ounces of Rahr Red Wheat roasted into something resembling chocolate malt.
I wisely measured out extra, because I suspected I would lose weight once the milling started. Little did I know, I would also lose weight while roasting the grains!
Yeah, these suckers kept popping out of the pan! I tried to gather up lost grains, but it seemed, as I stirred, they got bouncier and bouncier and as they "popped" they left the pain entirely. It wasn't a mass exodus, or anything. But, it was significant enough of a loss that I thought that I should use a much taller-sided pan in the future.
Soon, it will be time to bottle the Golden Cloud Ale, which smells done, and seems ready to leave my primary. Then, I will be brewing up a Dunkelweizen on the yeast cake, with my newly roasted grains.
We'll see how things taste. I'm not sure how far I got from Amber Wheat Malt to Chocolate Wheat Malt. I stopped when I smelled burning and chocolate and I was tired of making a big, huge mess. Also, I stopped because it was half an hour, and that was all the recipe said to do. This time, my first time, I wanted to be conservative and not risk the creation of black patent malt...
Regardless, I expect to drink the evidence.


 I like the oven better for evenness and cleanness. Next time, I'll use the oven.
My wife has a super-awesome cast-iron pot I could use, too, but I'm sort of afraid I'll be the one who damages the enamel finish first. I would be that guy, in our household!
Oven. Definitely the oven.
I like the oven better for evenness and cleanness. Next time, I'll use the oven.
My wife has a super-awesome cast-iron pot I could use, too, but I'm sort of afraid I'll be the one who damages the enamel finish first. I would be that guy, in our household!
Oven. Definitely the oven.


Wednesday, October 10, 2012
Fermentation Station

The spare room/office is still pretty crowded from our recent move. We're slowly settling in. In the mean time, this room is the perfect place for the beer. The ambient temperature is 74 degrees, and I'm throwing water bottles in and out of the freezer every few hours to get a fermentation range in an un-measured temperature that's probably about eight to ten degrees cooler. (As I unpack more, my thermometer might appear out of a box, and I could really know for sure!)
I'm hoping for most of the flavor out of the Danstar Munich yeast, and along those lines, I'm not aiming for a clean fermentation. I underpitched on purpose to stress the yeast a little, and I'm letting it go on the warm side of its range to up the yeast's distinctive characteristics away from a super traditional weizen.
For me, one of the reasons I love the system of a fermentation bucket inside of a larger water bucket with ice bottles, is that it will make every batch just a little bit different, even with the same ingredients. I will never perfectly nail any one temperature, and every batch will be an adventure. I will never know exactly what will come out each time. I only know that when I'm close, it will be good. How good? The excitement of not really knowing exactly how good it will be fuels my excitement for the batch to ferment.
There's an excitement in a more manual and less-machine-like process. There's an adventure to it. Also, it's a lot cheaper than running a second fridge just for buckets of beer, and it gives me something to do to stay close to my beer, interacting with it and helping it along.
Swamp coolers are recommended for busy bodies like me that like to feel like they're always doing something!
Next Entry: More Roasting of Malts!
Monday, October 8, 2012
BREWDAY: Golden Cloud Ale
Here is the recipe I put together for my very first all-grain brew, which - as expected - was not a perfect day, with some kinks in process, but a successful one that has produced something that looks like it will become a delicious beer.
2 gallon recipe, for a BIAB, small-batch brewer.
3.5 gallons of good water
2 pounds of Rahr Red Wheat
2 pounds of Rahr 2-Row
8 ounces of Badducky's Toasted Wheat and Barley Blend
4.63 ounces of Quaker Quick Oats (This is exactly 5% of the grain bill...)
0.2 ounces of Cluster Hops at 60 minutes for bittering
0.2 ounces of Styrian Celeja hops at 15 minutes for aroma/flavor
Danstar Munich Yeast
This will be my first BIAB, all-grain beer, and my first all-grain beer, at all, ever. I have done partial mashes with great success, and extracts with steeping grains, and even made some excellent meads. I've never gone all-grain, before. A big day. A banner day. Hooray for beer and for me.
There are steps in the process I don't have, yet, which are important steps, but for my first batch, I wanted to keep the process simple and skip anything that looked like it might add more work to the process, even if it meant producing a better product, just this once. To me, the goal was moving from crushed grain to a happy, fermenting primary with all the necessary steps one time, to see if I think there's things that will make it easier.
So, I didn't take a gravity reading. I have no tool for that, at this time. We moved a lot, recently, and the hydrometer is... I don't know where it is. Maybe I broke it. Hm.
Well, I took 3.5 gallons of water in my kettle, brought it to a boil first to cook off any craziness, and to time how long it took to move from cold to boil, for my future reference, on this new stove. (45 minutes, give or take five minutes.)
Once boiling, I flipped it off, and left it uncovered, with the thermometer in place, to wait until it fell down to just under 170 degrees. I was hoping for a mash of 154 degrees. I have no digital thermometer, and, again, I'm aiming for pretty close this time to see what happens.
Yay, dough in! I used a big voile bag from Northern Brewer to hold my grains, and stirred them in. The temperature was dead on as close to 154 you can get without a digital thermometer, so I closed the kettle and put it in an oven pre-heated to 170 degrees, which was immediately switched off.

If you can see beyond the reflection in the glass, you will see the real picture. A kettle in an oven is turning water and grains into sweet wort.
As I have no hydrometer, no ion paper, and no fancy doodads - plus, I was really uncertain about my first crush - I mashed for 90 minutes using a technique I picked up from partial mash brewing to know when I was done. I took a spoon and tasted the wort. When it tasted too watery, I put it back in. When it tasted like wort should, I pulled it out. 90 minutes. That's what I did. Sometimes, I turned on the oven again, to 170 degrees (the lowest setting on the range) and flipped it off to keep the temperature up.
I also put an extra pot on to boil, because I was uncertain about the volume of wort I was producing. I wanted two gallons of beer. New to the process, and to the stove, I had no true knowledge of the right amount of water for the BIAB method, with the sparge water included in the kettle.
I cannot say enough how great it must be to have some sort of hefty colander to haul the grains out of the kettle. This couple pounds of grain became quite very yes extremely heavy with hot water in it! I held it over the kettle to drain as best I could, switching hands and double-handing and switching hands again. Woof!
Sturdy Colander. I need one. Eventually. Doing things by hand is not supposed to be a point of suffering.
Back to a boil, and it took not long at all.

Cluster hops went in. We have now begun to make beer.
Anyway, with my 4-5 gallon kettle, and it less than half-full, I patted myself on the back for preparing extra water. But, I should not have. I had assumed from what I read that this should mitigate, if not remove the risk of boilovers entirely with such an amount of headroom. Not so, grasshopper. I hopped outside for a quick task of bleach-water-filling-in-the-sanitizer bucker...

I sat on the couch a moment to answer an e-mail, and soon I smelled the burnination. Oh, my...

Yeah, so anyone who tells you your risk of boilover is reduced with BIAB is selling you something. This boiled over in less than six minutes with a huge amount of headroom, after it appeared quite stably boiling along.
I made the best of it. I know we lost bittering, but it wasn't a highly bitter beer with IBUs around 12. I won't be upset if the first batch comes out unbalanced. First batches are all about learning. Learning that boilovers are just as common and normal and happening if you so much as look away from the kettle a moment!

Lovely mess I get to clean up, now. All over the new house's oven range, too. And the floor. and all the gunk all over the kettles, too.
The boil completed. The wort finished at only 1.5 gallons, thereabouts. Next time, I'll increase the amount of water in the beginning kettle to compensate. Also, I see why people produce those measuring sticks for their boil kettles, because if I had known I was running so short, I would have added more water at the beginning of the boil, not into the primary. I shall invest in a twenty-two inch PVC pipe, next, and measure out my gallon markers for my kettle of choice.
Wort cooled; yeast pitched. Wish me luck!
Want to help fuel my habit? Follow these links and pick up your own homebrew supplies from Amazon!
<iframe src="http://rcm.amazon.com/e/cm?lt1=_blank&bc1=000000&IS2=1&bg1=FFFFFF&fc1=000000&lc1=0000FF&t=httpjmmcdtrip-20&o=1&p=8&l=as4&m=amazon&f=ifr&ref=ss_til&asins=B0076QYCVY" style="width:120px;height:240px;" scrolling="no" marginwidth="0" marginheight="0" frameborder="0"></iframe>
Or, if you would prefer a simple kit:
<iframe src="http://rcm.amazon.com/e/cm?lt1=_blank&bc1=000000&IS2=1&bg1=FFFFFF&fc1=000000&lc1=0000FF&t=httpjmmcdtrip-20&o=1&p=8&l=as4&m=amazon&f=ifr&ref=ss_til&asins=B006QX6AZY" style="width:120px;height:240px;" scrolling="no" marginwidth="0" marginheight="0" frameborder="0"></iframe>
Hey, maybe you need a basic brewing rig, to start out with!
<iframe src="http://rcm.amazon.com/e/cm?lt1=_blank&bc1=000000&IS2=1&bg1=FFFFFF&fc1=000000&lc1=0000FF&t=httpjmmcdtrip-20&o=1&p=8&l=as4&m=amazon&f=ifr&ref=ss_til&asins=B002BTZZ5S" style="width:120px;height:240px;" scrolling="no" marginwidth="0" marginheight="0" frameborder="0"></iframe>
Next entry: Fermentation In My Station
Wednesday, October 3, 2012
Making a Big Mess With Grizzly Grain Mill
So, coming into a few Amazon gift cards and points, my wife and I were able to acquire a little mill for grain. I say "my wife and I" and I am not being truthful. Really, this was for me, all me, and me me me.

Hello, grain. Here you are looking at the grain bill for my first, all-grain brew. This recipe combines two pounds of Rahr Red Wheat with two pounds of Rahr 2-Row, 8 ounces of a special Toasted Malt (I'll cover that next time!), and 4.63 ounces, exactly, of Quaker Quick Oats. Let's cover the grinding today, not the toasting, and not the rest of this simple, little recipe.
I set the Grizzly Mill up on a wooden folding table we keep around the kitchen to use as an extra island. I put in my first bits of grain, to test it out. It seemed too fine. I adjusted to loosen it. And, ker-plunk. The screws on the sides that hold the faces together slipped away. Whole kernels were passing through. The third time was the charm.
 First grind achieved. Not a perfect milling, by any stretch, but reminiscent of what I had been accustomed to using the homebrew shops barley crusher. With a BIAB brew, I was confident I wouldn't have to be so finicky about the grind, if I just let it mash a little longer. Or a lot longer. Whatever.


It arrived, and I was excited to put it to use, grinding up some grains for my first homebrew. Word on the street was Charlie Papazian still uses a mill just like this one for his grind, and I happen to like the idea of keeping things small, simple, and hand-powered for a while. I like the physicality of the hobby. It connects me to the process in a way that makes me feel like I'm part of a tradition that goes back to Sumeria and before. (I say this, of course, after only milling a single batch for a 2 gallon brew, naturally.)
Still, I was excited!
I pulled everything out of the box. I put it together. I took it apart again. Puzzled, I searched the internet for access to information about this device that came with no instructions, whatsoever.
So...

Hello, grain. Here you are looking at the grain bill for my first, all-grain brew. This recipe combines two pounds of Rahr Red Wheat with two pounds of Rahr 2-Row, 8 ounces of a special Toasted Malt (I'll cover that next time!), and 4.63 ounces, exactly, of Quaker Quick Oats. Let's cover the grinding today, not the toasting, and not the rest of this simple, little recipe.
I set the Grizzly Mill up on a wooden folding table we keep around the kitchen to use as an extra island. I put in my first bits of grain, to test it out. It seemed too fine. I adjusted to loosen it. And, ker-plunk. The screws on the sides that hold the faces together slipped away. Whole kernels were passing through. The third time was the charm.

The Grizzly Mill is easy to use, but slippery. I had to remove the rubber spacers to get the mill grinding plates to hold together, and during my grind, I noticed that the wingnuts that hold everything in place are liable to slip out from the sides, throwing all the plates off and making even more of a mess than usual.


Also, the Grizzly Mill is SUPER MESSY. I tried using a bag over it to catch the flying grains, and all I succeeded at catching was the plastic bag in between the grinding plates. Also, the bag made it harder to see when my wingnuts were about to slip out of the sides. In the end, I just placed my free hand over the top, and held the finickiest of the screws in place, and gave in to the mess.
And, a mess it was...

This was the view, looking down at just one side of the wreckage.

How much grain do you think I lost, there? An ounce? Two ounces?

I almost swept this up onto the digital scale to get a reading of how bad my losses were, but I figured I was only seeing half the losses, what with all the powder that was flying up from the plates, and who knows how far things got flung where I didn't see them?
Things I have learned:
1) Wear a Face Mask or bandit-like bandanna when grinding: My sinuses were acting up the rest of the night and into the morning from inhaling all those powdered malts.
2) The Corona-style mill can produce a perfectly acceptable crush, but the mills will be a little crazy by themselves, and probably benefit from the sort of things homebrewers do to mod their equipment.


3) Do this outside. Let the lost grains return to nature, where I don't have to sweep. It's one less step for us during a long process. I see the driveway or the porch in my future, for grinding.
4) I ground my grains the night before brewday, because I expected to be working out kinks in my process. I'm both glad and sad that I did. The initial, fresh-crushed smell was so much better than the next morning's milled grains, sitting out overnight. But, the time saved was HUGE on brewday. Measuring out, and hand-cranking grains and cleaning up the mess takes some amount of time, and I say do it the night before to mitigate the time and stress on brewday.
5) When using a grain mill, up your measured grains about an ounce or two, to compensate for the losses due to cheap mills flinging everything all over the place.
Speaking of Charlie Papazian, if you are new to Homebrewing, I recommend his excellent book, wherein I learned all about milling and grinding my stuff.