Prononuced: "mole-ASS-ee WEET-sbee" It is, as can be deduced, a London ESB style with the twist of copious wheat malt, and a healthy dose of Blackstrap Molasses. (Also, some flaked oats. Flaked oats are great. So it'll be a little cloudy, so what? It's already a wheat beer!)
I just put this one in the primary yesterday. I'm getting the process down, and things are starting to get a lot better. This time, I was outside, again, grinding the grains, and I attempted to grind directly into the brew-kettle, with the bag already in place for the Brew-In-A-Bag brewday. I don't think I'll do this again, because as I was doing it I was concerned about the wear and tear on the brew bag. The whole point of this, to me, is to not be buying replacement equipment every ten minutes.
This was also an experiment in saved yeast from my Cluster Bomb. I am currently waiting to see if it takes off. I have some spare yeast, just in case of a failure to launch.
Another experiment: Reading on-line about other folks' recommendations with BIAB, I *dramatically* increased my efficiency by dunking the bag in the water a bit, then squeezing the bag, then placing the bag in a separate (dry, unheated) pot to let even more grain juice schlurp out of the bag.
I was looking at a brix of just over 10 before I did this, and ended up with a brix just above 16! I added some clean, filtered water just to get the brix down closer to the desired strength just before boiling!
Regardless, I have high hopes that this brew will come out good, even if it isn't on spec.
I made the crystal malt and the brown malt at home, using the instructions of John Palmer from "How to Brew" and it came out smelling wonderful, and providing a rich color to the brew. I made it with Rahr 2-Row.
Molasses (Wh)E(at)SB
3.75 gallon boil
batch size 3 gallons
boil time 60 minutes at 76% efficiency for figuring, but as I mentioned I had ridiculous efficiency such that I had to water it down just to keep from making an alcohol missile of a brew.
3 pounds of Rahr 2-row (40%)
3 pounds of Rahr Red Wheat (40%)
6 ounces homemade Brown Malt (5%)
6 ounces homemade Crystal 60l (5%)
6 ounces Quaker Quick Oats (5%)
6 ounces Blackstrap Molasses (5%)
0.6 ounces of Styrian Celeja @60 for 14.83 IBU
0.6 ounces of Styrian Celeja @30 for 11.4 IBU
0.6 ounces of Styrian Celeja @10 for 5.38 IBU
I used Danstar Nottingham that I harvested from a Cluster Bomb, and I'm hoping with fingers crossed that it will take. If it doesn't, I've got some spare dry Belgian yeast in the fridge, just in case, but I expect Nottingham to taste better in a Molassy London ESB-style of beer. Fingers crossed!
Pictures forthcoming... Later.
Showing posts with label rahr. Show all posts
Showing posts with label rahr. Show all posts
Sunday, December 2, 2012

Tuesday, November 27, 2012
Finally a Golden Cloud to be proud of...
Woot, but I am pleased to be drinking this one. I had had a few misses with the "golden cloud ale" recipe formulation. I knew if I could get it right, I'd find something really good and refreshing. Success finally came with an American Hefeweizen style.
This beer was brewed as much to develop a yeast culture that I could harvest as it was for the beer itself. I wanted a light, simple beer that would create an excellent yeast starter for the next brews when I washed the happy, unstressed yeast.
Call it a Pale Golden Cloud, or a Wheaten Cluster Beatdown, or whatever you call it. Just be sure to brace yourself for the vigorous (for a hefe!) hopping that provides a fruity and slightly spicy flavor to fill the mouth with vigorous, American hoppiness.
This is a Hefeweizen for the hop head inside you, and a lawnmower light beer for the Torpedo enthusiast! It's almost like a Smash of 2-row and Cluster, but with the added sweetness of wheat and oats to balance the bitter hops.
Next time, I believe the beer would be enhanced by toasting some of the base malt lightly, to add a little more complexity to the light-bodied beer.
OG 1.014
FG 1.012
20 IBU
3 Gallon Batch
2 pounds 4 ounces American 2-Row
2 pounds 4 ounces American Red Wheat
2 ounces Flaked Oats
@60 minutes .25 ounces of Cluster
@10 minutes .5 ounces of Cluster
Dry hop in secondary on .25 ounces of Cluster
Danstar Nottingham
I fermented on an autumnal porch out here in San Antonio, where the temperature was fluctuating between about 50 and about 70. I kept it in the shade, on the cooler side of the porch. I love the idea of letting yeast take on the teroir of the natural temperatures, doing their thing and doing it a little different every time depending on the influence of the natural winds and time. (Naturally, I don't love the idea of letting beer ferment outside, in San Antonio, in the summer, but when the weather is in the right range, I say let godisgreat experience the whims of god!)
4.8% ABW, and 158 calories, it's still going to have a few calories for a light beer, but with this much flavor in their glass I don't think anyone will complain.
The one place this beer is really distinct is in the color and cloudiness in the glass. It's like a cloud has infused a beer, with oats and wheats and yeasts creating this appearance that is definitely not clear, but still oddly appealing. The Hefeweizen style is supposed to be cloudy and foamy. The oats seem to really enhance that, and bring the cloudiness to a whole new level of funkiness. Not everyone will appreciate a beer that is intentionally cloudy like this, but I am not a clear beer snob when i know adding oats to the brew will taste great, and wheat beers seem to benefit from haze from my experiences with commercial beers in Germany and France. Haze is good if the taste is good!
The body is light and refreshing, with sweetness from the oats and wheat to try and balance the huge flavor of delicious Cluster hops. As it ages, I will be curious to see what it tastes like as the hops fade into the back of the flavor.
Next time I crack one open, I'm going to have to snap a picture.
This beer was brewed as much to develop a yeast culture that I could harvest as it was for the beer itself. I wanted a light, simple beer that would create an excellent yeast starter for the next brews when I washed the happy, unstressed yeast.
Call it a Pale Golden Cloud, or a Wheaten Cluster Beatdown, or whatever you call it. Just be sure to brace yourself for the vigorous (for a hefe!) hopping that provides a fruity and slightly spicy flavor to fill the mouth with vigorous, American hoppiness.
This is a Hefeweizen for the hop head inside you, and a lawnmower light beer for the Torpedo enthusiast! It's almost like a Smash of 2-row and Cluster, but with the added sweetness of wheat and oats to balance the bitter hops.
Next time, I believe the beer would be enhanced by toasting some of the base malt lightly, to add a little more complexity to the light-bodied beer.
OG 1.014
FG 1.012
20 IBU
3 Gallon Batch
2 pounds 4 ounces American 2-Row
2 pounds 4 ounces American Red Wheat
2 ounces Flaked Oats
@60 minutes .25 ounces of Cluster
@10 minutes .5 ounces of Cluster
Dry hop in secondary on .25 ounces of Cluster
Danstar Nottingham
I fermented on an autumnal porch out here in San Antonio, where the temperature was fluctuating between about 50 and about 70. I kept it in the shade, on the cooler side of the porch. I love the idea of letting yeast take on the teroir of the natural temperatures, doing their thing and doing it a little different every time depending on the influence of the natural winds and time. (Naturally, I don't love the idea of letting beer ferment outside, in San Antonio, in the summer, but when the weather is in the right range, I say let godisgreat experience the whims of god!)
4.8% ABW, and 158 calories, it's still going to have a few calories for a light beer, but with this much flavor in their glass I don't think anyone will complain.
The one place this beer is really distinct is in the color and cloudiness in the glass. It's like a cloud has infused a beer, with oats and wheats and yeasts creating this appearance that is definitely not clear, but still oddly appealing. The Hefeweizen style is supposed to be cloudy and foamy. The oats seem to really enhance that, and bring the cloudiness to a whole new level of funkiness. Not everyone will appreciate a beer that is intentionally cloudy like this, but I am not a clear beer snob when i know adding oats to the brew will taste great, and wheat beers seem to benefit from haze from my experiences with commercial beers in Germany and France. Haze is good if the taste is good!
The body is light and refreshing, with sweetness from the oats and wheat to try and balance the huge flavor of delicious Cluster hops. As it ages, I will be curious to see what it tastes like as the hops fade into the back of the flavor.
Next time I crack one open, I'm going to have to snap a picture.
Wednesday, October 24, 2012
BREWDAY: When life drops your butternut, make BUTTERNUT ALE!
Upon the kitchen table that is a family heirloom from when my parents were first married, I had placed two pie pumpkins, and a butternut squash.
I had every intention of making a pumpkin beer in a couple weeks, after pipelining some simple, small SMaSH Pale Ales to feature Cluster and Styrian Celeja hops in two otherwise identical brews. I had even toasted up 8 ounces of malt to a nice, nutty, medium toast, to be divided up between the two pale ales. I had even made up 8 ounces of a home-roasted caramel malt, made from soaking grain and caramelizing it in the oven and then roasting it to dry it out. I had done these things for Pale Ales.
The gods of homebrew hurled my butternut squash upon the ground. It cracked at the top, splitting evenly down the center, and halfway down the fruit.
Immediately, I roasted the squash to make some use out of it. If I had left it alone, it would have just rotted like that.
So... That was not part of our dinner plans, just yet.
Beer gods demanded Butternut Squash Beer.
Interesting fact: Most homebrewers who make pumpkin beer are probably already making butternut squash beer, because most commercial cans of pumpkin puree are actually a type of butternut squash, or a hybrid variety of squash/pumpkin called Dickenson Field Squash. Actual pumpkin, if you made it into a pie, would be a golden yellow color, not the orange we know and assume means pumpkin. Butternut Squash is what people are really thinking about, when they're imagining the flavor of pumpkin in their mind. It's richer, deeper, with a bright orange color, and it's a perfect thing to make beer with on an early autumn day!
I cobbled together a recipe with what I had lying around. Fortunately, I did have some more interesting malts in the brewcloset. (Plus some fresh spices straight from Grenada courtesy of my wife, whose family harvest cocoa, cinnamon, and amazing nutmeg and send it to us from their farm. Nutmeg and cinnamon were both from Grenada!)
This batch turned into a 3 gallon brew when I lost track of how much water I was pouring into the darn brew kettle... The end result was around 3 gallons, right?
I pulled up my edition of iBrewmaster...
BUTTERNUT STOUT!
3 gallons, thereabouts
OG: 1.062
FG: 1.017
30 SRM
(estimated mash efficiency of 86%)
3 pounds of Rahr 2-Row Pale
1 pound of Munich Malt
8 ounces of home-toasted malt
8 ounces of home-made caramel malt, est. at 100L-140L
6 ounces of Caraffa I
6 ounces of Dark Brown Sugar, added to the boil
half of a roasted butternut Squash for about 1.5 pounds, pureed
@60 minutes use 1 ounce of Cluster hops for about 40 IBU
@15 minutes, add one small cinnamon stick, 1/2 tsp of fresh-ground Nutmeg, .25 ounces of grated, fresh Ginger
Include in the full Primary (or secondary instead, if you plan to use one) with 1/4 of the cooked, pureed butternut squash
Pitch 1 full packet of Safale S-04
With Brew-in-a-bag, and a very fine grind, I'm expecting a super efficiency. I also did another overnight mash. In fact, my overnight mash went long because I got pulled away for some stuff for work in the morning, and could not get to the wort after eight hours. It was a thirteen-hour mash, then. I set the oven to 180 degrees when my wort, on the stovetop, was protein resting at 122 degrees for twenty minutes. By the time I got the wort to 154 degrees, the oven had reached 180 degrees. I put my kettle inside to mash overnight, and flipped the oven off. When I woke up, before I got an e-mail from work, I had flipped the oven back on to buy someself some more time, to 200 degrees. I had started the mash at ten o'clock, and didn't mash-out until almost eleven-fifteen.
And, my grind was very small, too. I was really aiming to pulverize this stuff, because I wanted to give BIAB a real go of it with a finer grind.
Anyway, woot for butternut squash! There's still a quarter of the squash sitting in the fridge for my wife.
Of note:
The squash that I put into the primary fermenter was microwaved just before putting it into the primary good and long, to make sure it was completely cooked and to make sure it was completely sanitary. It seemed like the easiest way to sanitize something that likes being cooked in a microwave, right?
Of note: Pictures of a brewday that was messy and spontaneous and fun.
The smell in the primary, just before pitching, was stunning. A milder dark roast, with Caraffa I instead of chocolate and medium-toasted malts instead of dark roasted malts, may not be the "perfect to style" stout, but it does ease into the stout flavors, allowing the butternut pie flavor with the sweetness of the caramel malts, to shine over the top of the dark, thick brew!
It's the sort of thing that makes me want to use exclamation points. Because the squash fell! I can make it into beer! The beer smells really good! Everything is working!
BUTTERNUT STOUT!
Pictures:


I had every intention of making a pumpkin beer in a couple weeks, after pipelining some simple, small SMaSH Pale Ales to feature Cluster and Styrian Celeja hops in two otherwise identical brews. I had even toasted up 8 ounces of malt to a nice, nutty, medium toast, to be divided up between the two pale ales. I had even made up 8 ounces of a home-roasted caramel malt, made from soaking grain and caramelizing it in the oven and then roasting it to dry it out. I had done these things for Pale Ales.
The gods of homebrew hurled my butternut squash upon the ground. It cracked at the top, splitting evenly down the center, and halfway down the fruit.
Immediately, I roasted the squash to make some use out of it. If I had left it alone, it would have just rotted like that.
So... That was not part of our dinner plans, just yet.
Beer gods demanded Butternut Squash Beer.
Interesting fact: Most homebrewers who make pumpkin beer are probably already making butternut squash beer, because most commercial cans of pumpkin puree are actually a type of butternut squash, or a hybrid variety of squash/pumpkin called Dickenson Field Squash. Actual pumpkin, if you made it into a pie, would be a golden yellow color, not the orange we know and assume means pumpkin. Butternut Squash is what people are really thinking about, when they're imagining the flavor of pumpkin in their mind. It's richer, deeper, with a bright orange color, and it's a perfect thing to make beer with on an early autumn day!
I cobbled together a recipe with what I had lying around. Fortunately, I did have some more interesting malts in the brewcloset. (Plus some fresh spices straight from Grenada courtesy of my wife, whose family harvest cocoa, cinnamon, and amazing nutmeg and send it to us from their farm. Nutmeg and cinnamon were both from Grenada!)
This batch turned into a 3 gallon brew when I lost track of how much water I was pouring into the darn brew kettle... The end result was around 3 gallons, right?
I pulled up my edition of iBrewmaster...
BUTTERNUT STOUT!
3 gallons, thereabouts
OG: 1.062
FG: 1.017
30 SRM
(estimated mash efficiency of 86%)
3 pounds of Rahr 2-Row Pale
1 pound of Munich Malt
8 ounces of home-toasted malt
8 ounces of home-made caramel malt, est. at 100L-140L
6 ounces of Caraffa I
6 ounces of Dark Brown Sugar, added to the boil
half of a roasted butternut Squash for about 1.5 pounds, pureed
@60 minutes use 1 ounce of Cluster hops for about 40 IBU
@15 minutes, add one small cinnamon stick, 1/2 tsp of fresh-ground Nutmeg, .25 ounces of grated, fresh Ginger
Include in the full Primary (or secondary instead, if you plan to use one) with 1/4 of the cooked, pureed butternut squash
Pitch 1 full packet of Safale S-04
With Brew-in-a-bag, and a very fine grind, I'm expecting a super efficiency. I also did another overnight mash. In fact, my overnight mash went long because I got pulled away for some stuff for work in the morning, and could not get to the wort after eight hours. It was a thirteen-hour mash, then. I set the oven to 180 degrees when my wort, on the stovetop, was protein resting at 122 degrees for twenty minutes. By the time I got the wort to 154 degrees, the oven had reached 180 degrees. I put my kettle inside to mash overnight, and flipped the oven off. When I woke up, before I got an e-mail from work, I had flipped the oven back on to buy someself some more time, to 200 degrees. I had started the mash at ten o'clock, and didn't mash-out until almost eleven-fifteen.
And, my grind was very small, too. I was really aiming to pulverize this stuff, because I wanted to give BIAB a real go of it with a finer grind.
Anyway, woot for butternut squash! There's still a quarter of the squash sitting in the fridge for my wife.
Of note:
The squash that I put into the primary fermenter was microwaved just before putting it into the primary good and long, to make sure it was completely cooked and to make sure it was completely sanitary. It seemed like the easiest way to sanitize something that likes being cooked in a microwave, right?
Of note: Pictures of a brewday that was messy and spontaneous and fun.
The smell in the primary, just before pitching, was stunning. A milder dark roast, with Caraffa I instead of chocolate and medium-toasted malts instead of dark roasted malts, may not be the "perfect to style" stout, but it does ease into the stout flavors, allowing the butternut pie flavor with the sweetness of the caramel malts, to shine over the top of the dark, thick brew!
It's the sort of thing that makes me want to use exclamation points. Because the squash fell! I can make it into beer! The beer smells really good! Everything is working!
BUTTERNUT STOUT!
Pictures:


Monday, October 22, 2012
BREWDAY: Red River Dunkelweizen
I have named this beer "Red River" in honor of my family's move to Texas. Also, I am hoping it will be red. My process is still working out the kinks, and there's just no way to be sure that I'm going to nail the color red. The name is hopeful. I am placing the name upon the beer, as if it might cast the spell upon it that encourages the color red to appear. (A brewer's mantra: A red river flows through you... A red river flows through you... A red river flows through you...?)


 <-filtering out the hops and escaped grains before the primary! In small batch brewing, I want all the beer I can get, and I don't want to lose any to trub and crud like this!
Why red? Because with the hint of chinese five spice and bay leaf, I'm really hoping to get a little taste of autumn in the glass.
Recipe:
2 lbs and 11 ounces of Rahr Red Wheat
1 lb of 2-row pale
4 ounces of homemade caramel/crystal malt
2 ounces of homemade chocolate wheat malt
.2 ounces of Styrian Celeja at 60 minutes for 8.81 IBU
.2 ounces of Styrian Celeja at 15 minutes for 4.37
1 bay leaf at 15 minutes
.5 tsp homemade Chinese Five Spice Blend at 15 minutes
.2 ounces of Cluster at 5 minutes for 2.73 IBU
Mashing this, I put all the grain in to room temperature water, and brought it up gently to 120-125 degrees, and held it there for ten minutes, stirring and allowing to settle. I thought it might help with the haziness of the last brew, even though such things are to style. After that, I brought it up to mash temp for medium body at 154, and then threw it into the pre-heated oven.
Concerned about my conversion last time, and still sans refractometer, I went the other extreme. I did an overnight mash, in the oven. After about an hour, I flipped the oven off, and left it closed. I let the grain and water rest until the next day in the warm oven, hopefully converting everything. (My PH and water chemistry research continues, naturally, but I'm trying simple solutions first.)
In the morning, I put it all out on the stove and it was 144 degrees! (I'm sure I got about as much conversion as possible when it stayed successfully warm for so long!)
From there, I brought up the temperature to mash-out at 170, and then drained out the grains. (With those grains, I brewed up some bread to go with the beer. See prior post!)
This was the easy boil I had heard about in a biab, with no boilovers and not even a moment's unrest over such things. Additions were added. Coffee was enjoyed. Cooling off in the sink was simple.
Breaking up the brewday process with an overnight mash was very nice. It gave me something to look forward to in the morning, and spreads the time spent brewing out a while.
Once the wort cooled to pitching temps, I put this straight down onto the yeastcake from the Golden Cloud Ale, and it seems to have made beer. I hit it with lots of ice during the week, and kept it down. The smell out of the fermentor has a lot more balance of banana against the clove. I'll be bottling soon. Hopefully, I'll be drinking soon, too!
Pictures:


 <-filtering out the hops and escaped grains before the primary! In small batch brewing, I want all the beer I can get, and I don't want to lose any to trub and crud like this!
Man, I need to get me one of these:
Friday, October 19, 2012
BREAD DAY: What to do with those leftover brewing grains?
I don't like waste. We compost in our house. We make use of old things. We don't waste. When I look upon my spent brewing grains, I see excellent compost for our garden, and I also see an excellent ingredient for delicious bread.
The first time I made bread with spent brewing grains, I dumped nearly a pound of dark, roasty steeping grains from an extract batch out onto the counter and added flour until it became bread like. Man, it was thick. Two giant loaves of dark, malty, chewy, grainy breads was too much!
With my current BIAB set-up, I can use a finer crush of grain. This is a good thing for breadmaking. Also, I don't know if I would ever use that much caraffa in a bread recipe, again, because, like, WHOA - too roasty!
But, with my recent brew completed (which will be coming soon), I dug my spoon into the spent brewing grains after mash-out, and snagged about half a cup of them.


I mash in the oven. When mashing in the oven and making beer, think about this: You just pulled the converted grains out of the oven and the beer is rising to boil while you are making the dough. The bread rises in the (already warm) oven while you do your additions and stir the kettle. Finally, when you're cooling the wort, you lay the bread out and send it back into the oven. By the time your cleanup is complete, you have fresh bread!
The process is synergistic.

Then, I dropped them into the food processor (dough blade attached!) with three cups of King Arther brand Whole Grain Flour, a pinch or two of bread yeast, some salt, a tablespoon of olive oil, honey, and 1/2-3/4 cup of water. (While processing, I adjusted the water to get the consistency of good bread dough.)

I let it rise for an hour or two. It rose. I spread it out flat on a greased cookie sheet, and sprinkled the top with onion powder and carraway seeds, with more olive oil!
Bake at 375 degrees for about half an hour and voila!

My sister said it was the best thing I'd made, to date.
Next bread-making plans involve some of that rahr red wheat, my handy-dandy grinder, and no beer, at all!

Get good flour, people. Get the good flour.
Monday, October 15, 2012
Roasted Chocolate Wheat Experiment #1
This process looked like it was going to be the easiest one, yet.
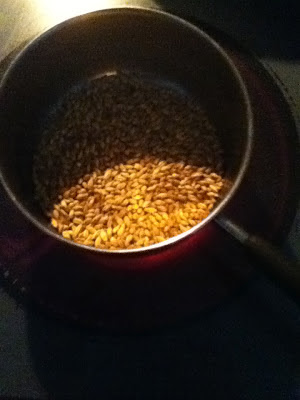
Stovetop roasting of Rahr Red Wheat, half an hour at a medium/low heat, with constant stirring, followed by degassing in a paper bag for a week.
Simple right? For this recipe, I wanted 2 ounces of Rahr Red Wheat roasted into something resembling chocolate malt.
I wisely measured out extra, because I suspected I would lose weight once the milling started. Little did I know, I would also lose weight while roasting the grains!
Yeah, these suckers kept popping out of the pan! I tried to gather up lost grains, but it seemed, as I stirred, they got bouncier and bouncier and as they "popped" they left the pain entirely. It wasn't a mass exodus, or anything. But, it was significant enough of a loss that I thought that I should use a much taller-sided pan in the future.
Soon, it will be time to bottle the Golden Cloud Ale, which smells done, and seems ready to leave my primary. Then, I will be brewing up a Dunkelweizen on the yeast cake, with my newly roasted grains.
We'll see how things taste. I'm not sure how far I got from Amber Wheat Malt to Chocolate Wheat Malt. I stopped when I smelled burning and chocolate and I was tired of making a big, huge mess. Also, I stopped because it was half an hour, and that was all the recipe said to do. This time, my first time, I wanted to be conservative and not risk the creation of black patent malt...
Regardless, I expect to drink the evidence.


 I like the oven better for evenness and cleanness. Next time, I'll use the oven.
My wife has a super-awesome cast-iron pot I could use, too, but I'm sort of afraid I'll be the one who damages the enamel finish first. I would be that guy, in our household!
Oven. Definitely the oven.
I like the oven better for evenness and cleanness. Next time, I'll use the oven.
My wife has a super-awesome cast-iron pot I could use, too, but I'm sort of afraid I'll be the one who damages the enamel finish first. I would be that guy, in our household!
Oven. Definitely the oven.


Monday, October 8, 2012
BREWDAY: Golden Cloud Ale
Here is the recipe I put together for my very first all-grain brew, which - as expected - was not a perfect day, with some kinks in process, but a successful one that has produced something that looks like it will become a delicious beer.
2 gallon recipe, for a BIAB, small-batch brewer.
3.5 gallons of good water
2 pounds of Rahr Red Wheat
2 pounds of Rahr 2-Row
8 ounces of Badducky's Toasted Wheat and Barley Blend
4.63 ounces of Quaker Quick Oats (This is exactly 5% of the grain bill...)
0.2 ounces of Cluster Hops at 60 minutes for bittering
0.2 ounces of Styrian Celeja hops at 15 minutes for aroma/flavor
Danstar Munich Yeast
This will be my first BIAB, all-grain beer, and my first all-grain beer, at all, ever. I have done partial mashes with great success, and extracts with steeping grains, and even made some excellent meads. I've never gone all-grain, before. A big day. A banner day. Hooray for beer and for me.
There are steps in the process I don't have, yet, which are important steps, but for my first batch, I wanted to keep the process simple and skip anything that looked like it might add more work to the process, even if it meant producing a better product, just this once. To me, the goal was moving from crushed grain to a happy, fermenting primary with all the necessary steps one time, to see if I think there's things that will make it easier.
So, I didn't take a gravity reading. I have no tool for that, at this time. We moved a lot, recently, and the hydrometer is... I don't know where it is. Maybe I broke it. Hm.
Well, I took 3.5 gallons of water in my kettle, brought it to a boil first to cook off any craziness, and to time how long it took to move from cold to boil, for my future reference, on this new stove. (45 minutes, give or take five minutes.)
Once boiling, I flipped it off, and left it uncovered, with the thermometer in place, to wait until it fell down to just under 170 degrees. I was hoping for a mash of 154 degrees. I have no digital thermometer, and, again, I'm aiming for pretty close this time to see what happens.
Yay, dough in! I used a big voile bag from Northern Brewer to hold my grains, and stirred them in. The temperature was dead on as close to 154 you can get without a digital thermometer, so I closed the kettle and put it in an oven pre-heated to 170 degrees, which was immediately switched off.

If you can see beyond the reflection in the glass, you will see the real picture. A kettle in an oven is turning water and grains into sweet wort.
As I have no hydrometer, no ion paper, and no fancy doodads - plus, I was really uncertain about my first crush - I mashed for 90 minutes using a technique I picked up from partial mash brewing to know when I was done. I took a spoon and tasted the wort. When it tasted too watery, I put it back in. When it tasted like wort should, I pulled it out. 90 minutes. That's what I did. Sometimes, I turned on the oven again, to 170 degrees (the lowest setting on the range) and flipped it off to keep the temperature up.
I also put an extra pot on to boil, because I was uncertain about the volume of wort I was producing. I wanted two gallons of beer. New to the process, and to the stove, I had no true knowledge of the right amount of water for the BIAB method, with the sparge water included in the kettle.
I cannot say enough how great it must be to have some sort of hefty colander to haul the grains out of the kettle. This couple pounds of grain became quite very yes extremely heavy with hot water in it! I held it over the kettle to drain as best I could, switching hands and double-handing and switching hands again. Woof!
Sturdy Colander. I need one. Eventually. Doing things by hand is not supposed to be a point of suffering.
Back to a boil, and it took not long at all.

Cluster hops went in. We have now begun to make beer.
Anyway, with my 4-5 gallon kettle, and it less than half-full, I patted myself on the back for preparing extra water. But, I should not have. I had assumed from what I read that this should mitigate, if not remove the risk of boilovers entirely with such an amount of headroom. Not so, grasshopper. I hopped outside for a quick task of bleach-water-filling-in-the-sanitizer bucker...

I sat on the couch a moment to answer an e-mail, and soon I smelled the burnination. Oh, my...

Yeah, so anyone who tells you your risk of boilover is reduced with BIAB is selling you something. This boiled over in less than six minutes with a huge amount of headroom, after it appeared quite stably boiling along.
I made the best of it. I know we lost bittering, but it wasn't a highly bitter beer with IBUs around 12. I won't be upset if the first batch comes out unbalanced. First batches are all about learning. Learning that boilovers are just as common and normal and happening if you so much as look away from the kettle a moment!

Lovely mess I get to clean up, now. All over the new house's oven range, too. And the floor. and all the gunk all over the kettles, too.
The boil completed. The wort finished at only 1.5 gallons, thereabouts. Next time, I'll increase the amount of water in the beginning kettle to compensate. Also, I see why people produce those measuring sticks for their boil kettles, because if I had known I was running so short, I would have added more water at the beginning of the boil, not into the primary. I shall invest in a twenty-two inch PVC pipe, next, and measure out my gallon markers for my kettle of choice.
Wort cooled; yeast pitched. Wish me luck!
Want to help fuel my habit? Follow these links and pick up your own homebrew supplies from Amazon!
<iframe src="http://rcm.amazon.com/e/cm?lt1=_blank&bc1=000000&IS2=1&bg1=FFFFFF&fc1=000000&lc1=0000FF&t=httpjmmcdtrip-20&o=1&p=8&l=as4&m=amazon&f=ifr&ref=ss_til&asins=B0076QYCVY" style="width:120px;height:240px;" scrolling="no" marginwidth="0" marginheight="0" frameborder="0"></iframe>
Or, if you would prefer a simple kit:
<iframe src="http://rcm.amazon.com/e/cm?lt1=_blank&bc1=000000&IS2=1&bg1=FFFFFF&fc1=000000&lc1=0000FF&t=httpjmmcdtrip-20&o=1&p=8&l=as4&m=amazon&f=ifr&ref=ss_til&asins=B006QX6AZY" style="width:120px;height:240px;" scrolling="no" marginwidth="0" marginheight="0" frameborder="0"></iframe>
Hey, maybe you need a basic brewing rig, to start out with!
<iframe src="http://rcm.amazon.com/e/cm?lt1=_blank&bc1=000000&IS2=1&bg1=FFFFFF&fc1=000000&lc1=0000FF&t=httpjmmcdtrip-20&o=1&p=8&l=as4&m=amazon&f=ifr&ref=ss_til&asins=B002BTZZ5S" style="width:120px;height:240px;" scrolling="no" marginwidth="0" marginheight="0" frameborder="0"></iframe>
Next entry: Fermentation In My Station
Subscribe to:
Posts (Atom)